|
Kiwithrottlejockey
Guest
|
 |
« on: April 02, 2009, 11:07:26 pm » |
|
Egg-citing chocolate recipeThe Dominion Post | Thursday, 02 April 2009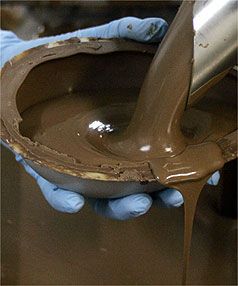 CHOCOLATE TREAT: Think how delicious your home-crafted egg will taste.Since Easter increasingly means chocolate, we've got a rich and decadent egg recipe which should make you a very popular bunny. CHOCOLATE TREAT: Think how delicious your home-crafted egg will taste.Since Easter increasingly means chocolate, we've got a rich and decadent egg recipe which should make you a very popular bunny.
The filling is rich and smooth, and can be made with either dark or white chocolate, which can in turn be coated with either the same type of chocolate, or for a contrast the other type. (Note: a white coating will probably not be opaque enough to completely conceal a dark filling.) HOMEMADE EASTER EGGSFor 12-15 eggs ...Filling:- 150g dark or white chocolate
- 2 tbsp orange liqueur or ½ tsp finely grated orange zest
- 2 tbsp orange juice
- 25g butter
- 1 egg yolk
To coat:- 100-150g dark or white chocolate
- ½-1 tsp Kremelta (optional)
Method:- Break chocolate into squares and put in a round microwave-proof or heat-proof glass container with the liqueur or orange zest and juice.
- Microwave uncovered on defrost (30 percent) power for 3-4 minutes, stirring every 30 seconds or so, or heat in a bowl over boiling water until the chocolate has melted enough to be mixed smoothly with the liqueur.
- Stir in the butter and egg yolk until well combined. Refrigerate until firm enough to shape into roughly walnut-sized egg shapes.
- Arrange the eggs on a baking paper-lined tray, and place in the fridge or freezer for at least 20-30 minutes (or overnight).
- When the fillings are well chilled, prepare your choice of coating.
- Break or chop the chocolate up into small pieces, place it in small bowls and melt it in the microwave or on the stovetop, as described above, and stir until it is smooth and glossy.
- If it seems thick, you can thin it a little by adding ½-1 tsp Kremelta and stirring again. Cover a tray with baking paper.
- One at a time, take a chilled centre and dunk it in the melted chocolate.
- Turn it so it is coated on all sides, then lift out immediately (or it will begin to melt).
- Let it drain for a second or two, then place it on the tray.
You may have, or can buy special wire loops for dipping chocolates, or you can fashion your own from soft wire, or use a fork.
It may take a few goes to work out a system that gives a smooth, unblemished coating, but even if they don't look perfect they still taste great. Refrigerate again until the chocolate has set.
Refrigerate or freeze in a covered container until required.http://www.stuff.co.nz/life-style/food-wine/recipes/2310425
|
|
|
|
|
|
|
|


